
The TotalYmage back-office allows to create and manage users, environments, 360° videos, 3D videos and media, to give access rights on these types of data and to access users activity.
The different roles of a user
A user can be given any of the 5 following roles. A role determines what the user is able to access and manage in the TotalYmage back-office and in the TotalYmage application.
Administrator, partner and super administrator users can only give an equal or lower role than their role.
Visitor
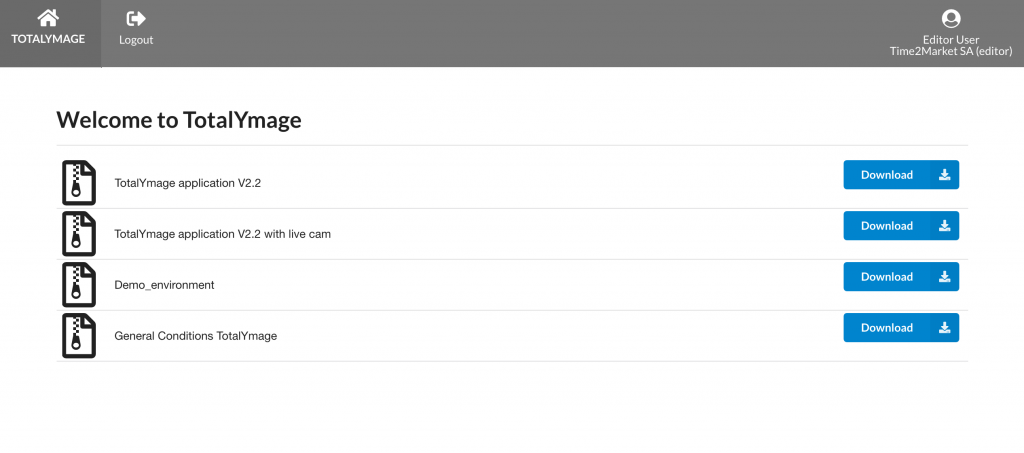
In the back-office a visitor user can see and download the files in the “TotalYmage” section and can logout.
In the TotalYmage application a visitor user can download environment versions, 3D videos and media on which he/she was given access rights.
The visitor user can open a downloaded environment version and click on the overlays but can’t create or modify any content in the environment version.
The visitor user can’t upload a version of an environment.
Editor
In the back-office an editor user can do the same as a visitor user.
In the TotalYmage application an editor user can do the same as a visitor user.
An editor user can also create an environment, edit an existing environment, modify and add content in the environment, upload his/her environment version to the back-office.
An editor user can give access rights on an environment version he/she uploaded in the back-office, to users and groups of users. This automatically gives access rights to the same users on all 3D videos and media linked to the environment version.
Administrator
In the back-office an administrator user can access the “TotalYmage”, “Users”, “Sessions”, “Environments”, “360° videos” and “3D videos” sections and can logout.
An administrator user can create, modify and delete all users, environment versions, 360° videos and 3D videos belonging to his/her company.
An administrator user can give access rights on any of the company data to any user and group of users of the company. Access rights can be given on environment versions, 3D videos and media individually, but access rights given on an environment version are propagated to the 3D videos and media that are linked to the environment version.
When the company is managed by a partner company that can manage several clients companies in the back-office, an administrator user can accept or prevent the partner user to manage the company’s data, as well as the access rights given on their data to users.
If the administrator user has accepted to be assisted by the partner company for the administration of the company’s account, the administrator user at any time modify the administration rights given to the partner company.
The administrator user can access the back-office at all times, control the access rights given to users and modify them.
In the TotalYmage application an administrator user has the same rights as an editor user.
Partner
In the back-office a partner user can do the same as an administrator user, for each of the companies he/she manages.
A partner user can also access the “Companies” section to create, manage and delete their clients’ companies.
When an administrator user of a partner-managed company accepts the partner in an administration role in the back-office, the partner user can assist the company administrator users to create, manage and delete all users, environment versions, 360° videos, 3D videos and media for the company; as well as manage the access rights on the environments versions, 3D videos and media of all companies registered in the TotalYmage back-office.
When an administrator user of a partner-managed company prevents the administration role of the partner user, the super administrator users will be the only ones to be able to assist the company administrator users to create, manage and delete all users, environment versions, 360° videos, 3D videos and media for the company; as well as manage the access rights on the environments versions, 3D videos and media of the company.
At any time the administrator user of a partner-managed company will be able to access the back-office and modify the administration rights of their partner company in the back-office.
In the TotalYmage application a partner user has the same rights as an editor user.
A partner user can create a new environment and upload the environment version to a company among the ones he/she manages. This allows the partner user to work for the client company and deliver new or modified environment versions.
As any other user, the partner user can use the TotalYmage application to download an environment version and their associated 3D videos and media, only if the partner user was given rights to access the environment version. If the partner user was not given access rights to an environment version, the partner user won’t even see in the TotalYmage application the name of the environment version in the list of the downloadable environment versions.
After a partner user uploaded an environment version of a company, the partner user cannot upload it to an other company among the ones he/she manages. But the partner user can duplicate (creation by copy) an environment version belonging to a company, can modify it (or not) and upload it to the other company account. Hence the partner user can manage separately the same environment structure and content with different clients. All content are segregated in each company back-office account.
Super administrator
In the back-office a super administrator (that’s us!) can create, manage and delete all companies, users, environment versions, 360° videos, 3D videos and media for all registered companies in the TotalYmage back-office.
This is a super administration role in the back-office but it doesn’t give access to the environments data and images of the companies.
A super administrator can assist the administrator users of any company to manage their data and the access rights on their environments versions, 3D videos and media in the TotalYmage back-office.
At any time an administrator user of a company can control the rights given on any data of the company and can ask for the assistance of a super administrator.
In the TotalYmage application a super administrator user has the same rights as an editor user.
The super administrator user can create a new environment and upload the environment version to any company registered in the TotalYmage back-office. This allows the super administrator to work for any company and deliver new or modified environment versions.
As any other user, the super administrator user can use the TotalYmage application to download an environment version and their associated 3D videos and media, only if the super administrator user was given rights to access the environment version. If the super administrator user was not given access rights to an environment version, the super administrator user won’t even see in the TotalYmage application the name of the environment version in the list of the downloadable environment versions.
After a super administrator user downloaded an environment version of a company, the partner user cannot upload it to an other company. But the super administrator user can duplicate (creation by copy) an environment version belonging to a company, can modify it (or not) and upload it to an other company account. Hence the super administrator user can manage separately the same environment with different clients. All content are segregated in each company back-office account.
Registration of a user
The administrator of a company has two ways to create the users accounts in the company’s back-office account: creating or inviting a new user.
Create new users directly by filling the “New User” form
The administrator must input the future user’s email, first name, last name, password, the preferred language and the role of the user : visitor or editor or administrator
By saving the user’s data the user account is immediately created.
Invite users to register to the TotalYmage back-office
Please note that this functionality has been disallowed but will be reworked soon.
The administrator must input the future user’s email, the preferred language and the role of the user : visitor or editor or administrator.
The invited user receives an invitation email and needs to click on the link to register.
The invited user must input first name, last name and password, and confirm acceptance of the TotalYmage general terms to register.

Upon filling in the different fields and activating the account, the user will be registered as a TotalYmage user.
The credentials are immediately active.
User credentials are unique and must not be shared between users.
With the same credentials the user has unique and personal access to the back-office, to the TotalYmage application and related applications.
Login of a user
If the company set-up uses the TotalYmage Cloud, it is easy to access the back-office at admin.totalymage.com/home.
If the set-up is On Premises, the administrator of the company must provide its users with a specific address to access the back-office.
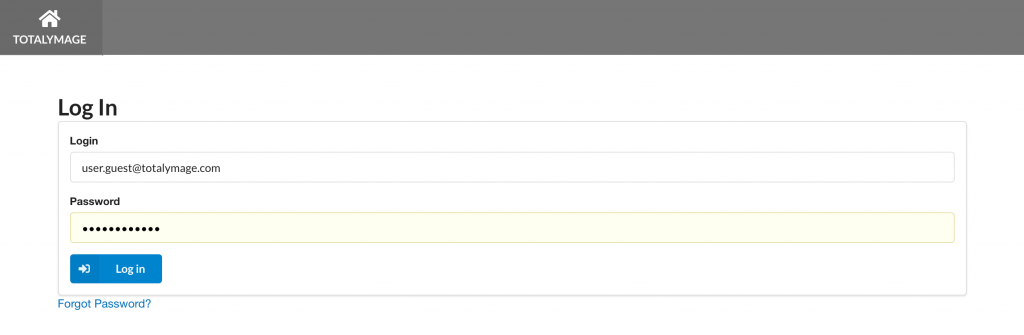
Upon opening the back-office home page, a user has to input the credentials he was given to access the back-office functionalities.
Other authentication processes than a login and a password can be put in place by the administrator of the company; using for example the Active Directory, SSO, MFA, physical security keys, or security tokens shared with third party applications.
Double authentication processes (SMS, email, external key) also can be put in place to increase the data security.
This will always remain at the choice of the company to decide the authentication process of its users and to make a request to the TotalYmage IT team for some specific set-up or development.
The back-office menu
Upon login to the back-office a user can access or manage different types of information depending on the role the administrator of the company gave the user.
A visitor and an editor user can only access the TotalYmage section where they can download the available files.
An administrator user can create and manage all data in the back-office account of the company.
The data is separated in different sections.
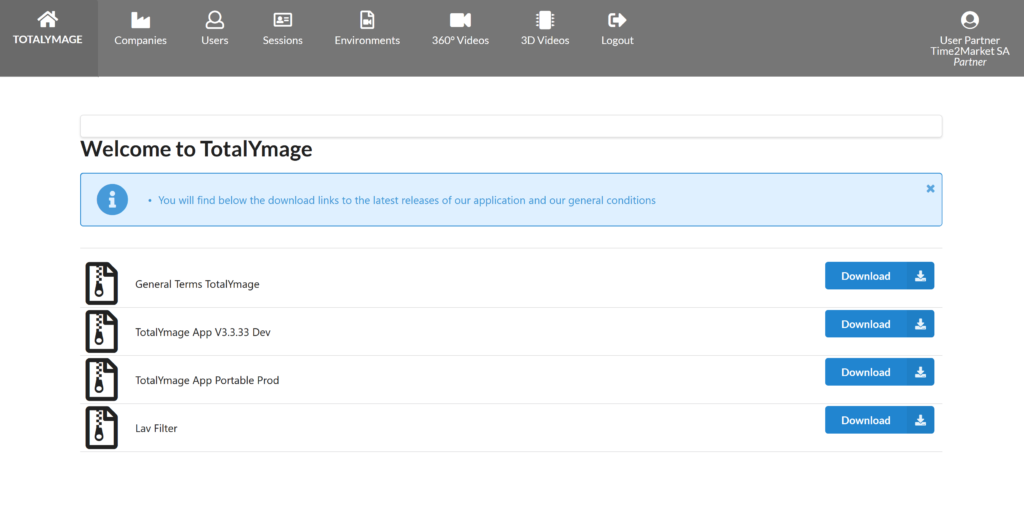
A partner user can create and manage all data of the partner company in the back-office.
A partner user can create his/her clients companies ; and is able to support his/her clients and manage their data in the back-office when the client administrators give the partner the access to their data.
A super administrator (that’s us!) can create and manage all data of the Time2Market company in the back-office.
A super administrator can create companies in the TotalYmage back-office ; and is able to support any TotalYmage client and manage their data in the back-office when the client administrators give the super administrator the access to their data.
We document below all sections.
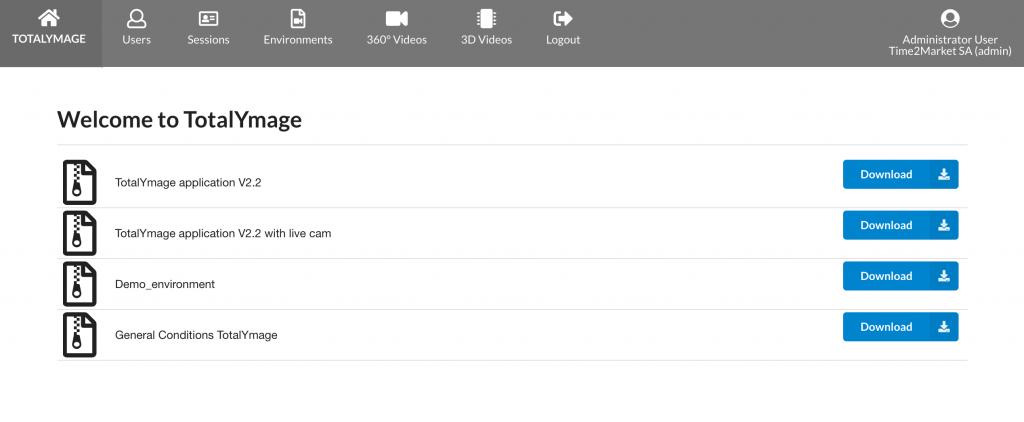
The TOTALYMAGE section
A Super administrator user (that’s us !) can create new files to be downloaded by all users in the “TOTALYMAGE” section.
Upon clicking on the “TOTALYMAGE” section, all users have access to these files.
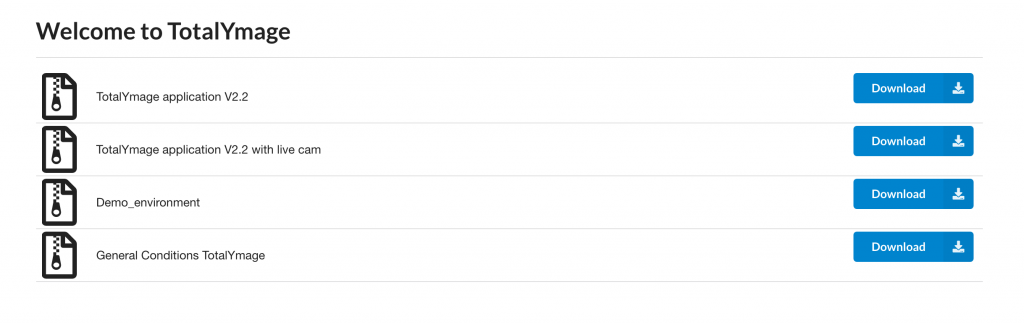
We generally give users access to:
– the latest TotalYmage application versions
– specific TotalYmage tools
– the latest General Terms to use the TotalYmage applications
The different types of TotalYmage application versions that are posted in the “TotalYmage” tab are:
– TotalYmage App VX.Y.Z Exe:
– a production version that contains a Windows installer
– a user must download the file,
– run the .exe program which shows installation windows
– and eventually stores the TotalYmage App in the Windows applications list on the user’s computer
– TotalYmage App VX.Y.Z Portable:
– a production version that can be installed anywhere
– on the hard drive of the user’s computer,
– on a USB key,
– on an external drive
– this allows a user to run the TotalYmage application from anywhere,
– without the need to install the application on the computer
– for example a corporate company can distribute USB keys to its clients
– the clients can run the application and discover a TotalYmage environment without any installation
– TotalYmage App VX.Y.Z Dev:
– a development version with the debug console
– running the dev version allows to find the source of issues
– in case of a bug a debug message is displayed on the bottom left corner
– please open the .txt file, save it and
– send it to contact@totalymage.com with a description of the conditions when the bug happened
– please always close the application after a bug
– and restart the application
– type “fn f1” to show/hide the events journal
The Companies section
Administrator users have access to the “My Company” section.
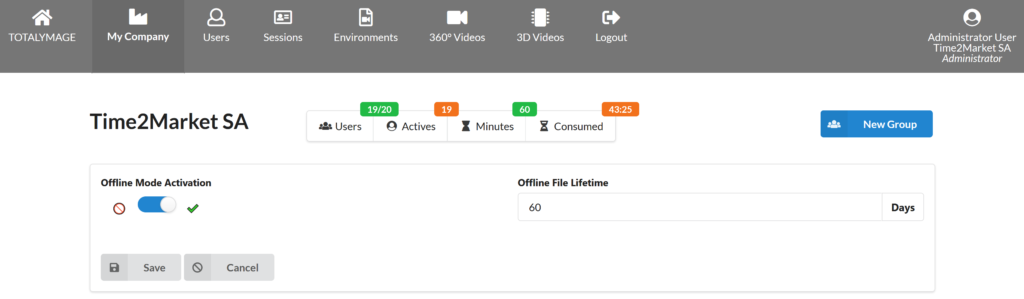
Administrator users can see their licence usage, in number of users and minutes of 3D videos.
An administrator can create a group and include registered users.
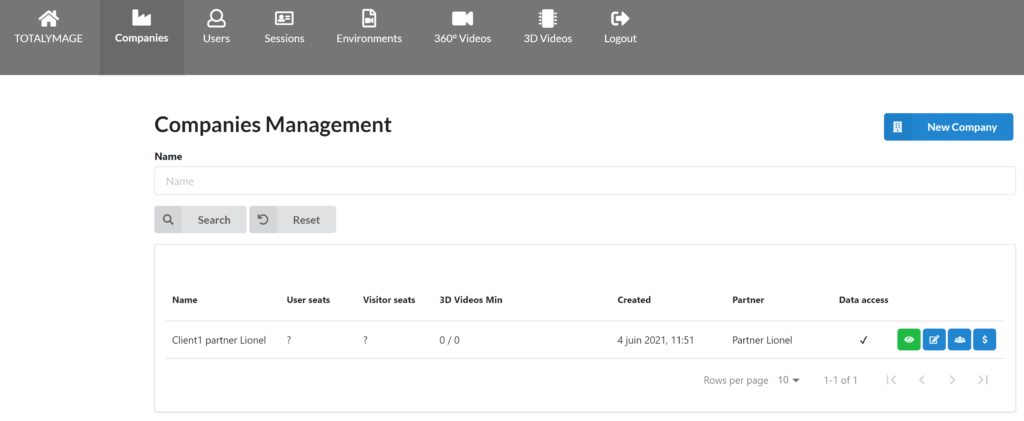
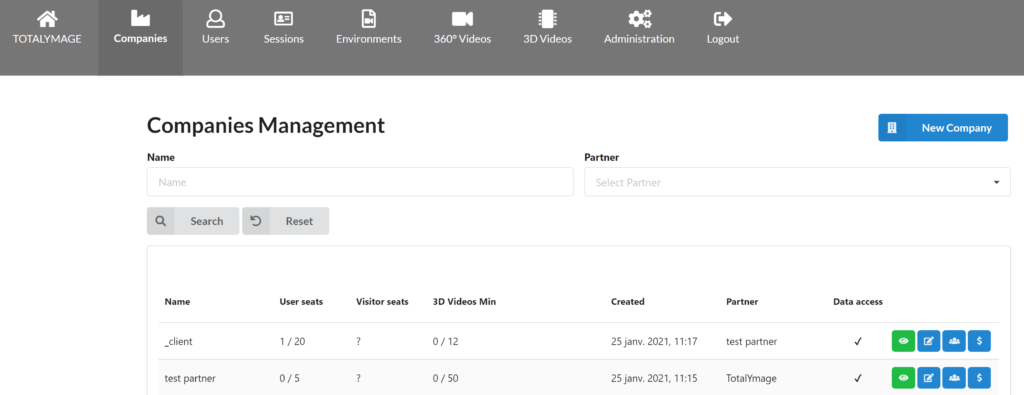
A partner user and a super administrator user can create and manage the registered companies in the “Companies” section.
Administrator, editor and visitor users don’t have access to the “Companies” section.
A partner user or a super administrator can create accounts for their clients.
The partner user or super administrator user must create a company for each client.
All content are segregated in a different account for each company.
To create a new company, a partner user or super administrator user must click on the “New Company” button.
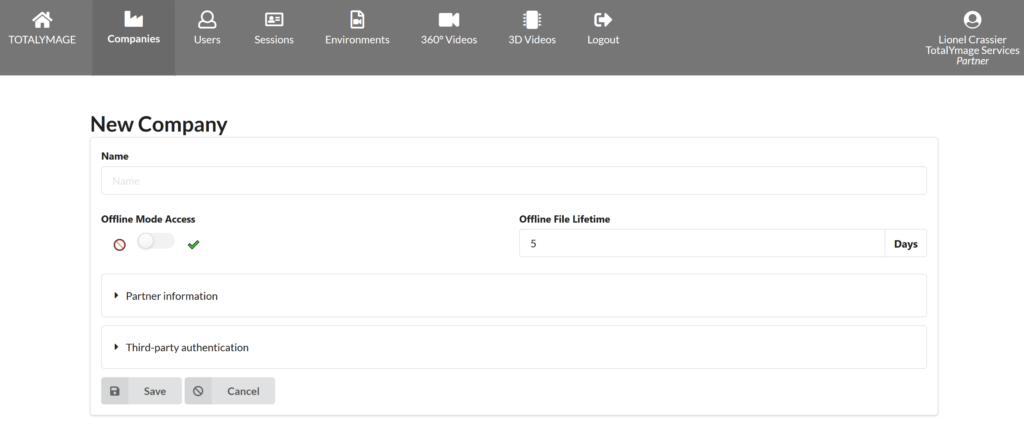
The partner user or super administrator user must enter the Name of the Company.

The partner user or the super administrator user can grant an Offline Mode Access to the company, giving the company users the authorization to access the TotalYmage application even when they don’t have an internet or wifi connection. The usual Offline File Lifetime for the company users is 5 days to allow a user to work offline during an entire week when on a remote site with limited internet access. But the proper number of offline days can be defined with the partner or the super administrator.
An administrator user of a company can decide to grant this offline access to the company users. This is of course not compulsory for a company if internet is always available. The administrative users can decide later on and change their choice for Offline Access.
Each time a user logins to the TotalYmage application with an internet access, an expiring date of the Offline connection is set to the current date/time + the defined Offline File Lifetime, until which the user can login to the TotalYmage application even without an internet connection.
Upon clicking on the “Save” button, the company is created in the TotalYmage back-office.
In the case of the companies management by a super administrator user, the list of the companies can be filtered by partner company, displaying the companies managed by a specific partner.

An administrator user can create and manage groups for his/her company.
A partner user can create and manage groups for the company he/she manages.
A super administrator user can create and manage groups for all registered companies on the TotalYmage platform.
A group always belongs to a company and can be managed by its administrator users, and can be assisted by a partner user (when existing) and super administrator users.
Group creation
To create a group the administrator user must click on the “Group” button.

Upon clicking on the “Group” button, the “Groups Management” page is displayed.
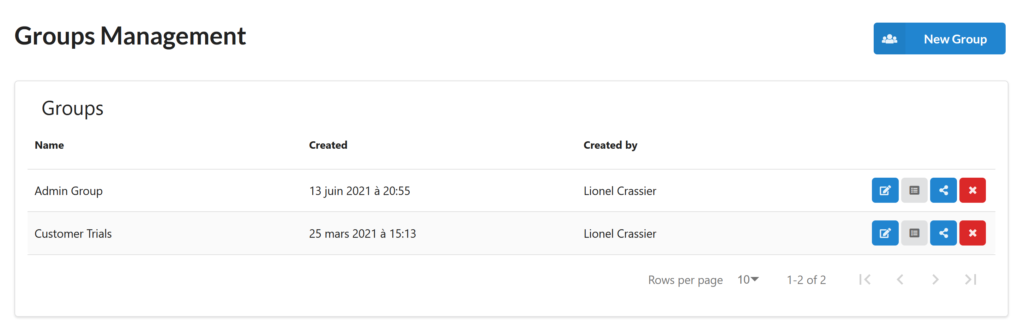
The existing groups are displayed.
An administrator user can modify a group, display the group’s members, invite users that are external to the company and delete the group.
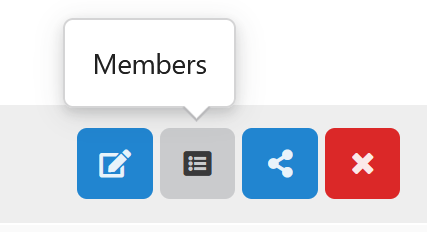
At any time the administrator user can display the members of a group by clicking on the “Members” button.
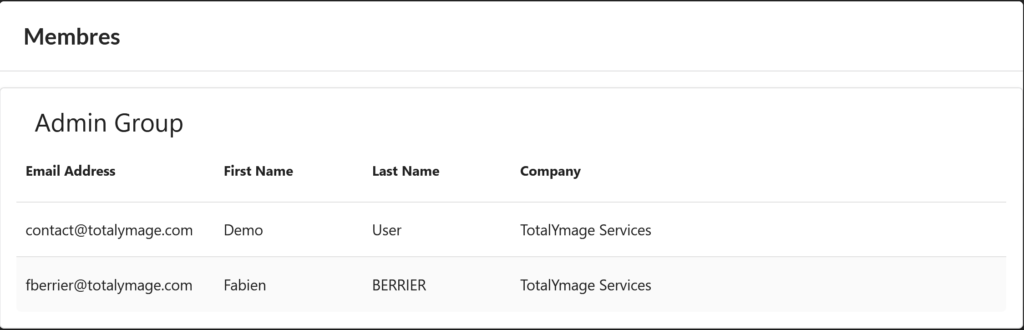
To add a new member in a group or to delete a group member, the administrator user must modify the profile of the user in the “Users” section.
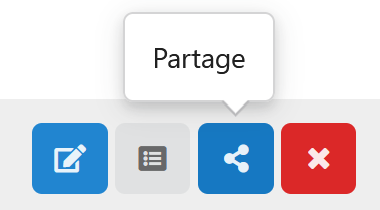
When an administrator user wants to include a user from an other company in a group, the administrator user must invite the guest user by clicking on the “Share” button.
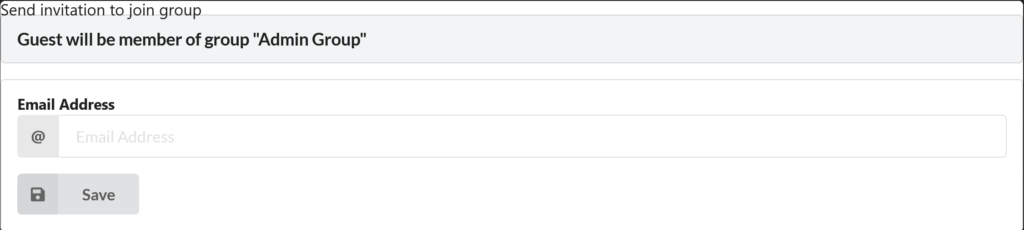
The administrator user must enter the email address of the guest user.
The guest user will receive a notification while login to the the TotalYmage back-office.
Upon the validation of the invitation by the guest, the guest user will become a member of the group.
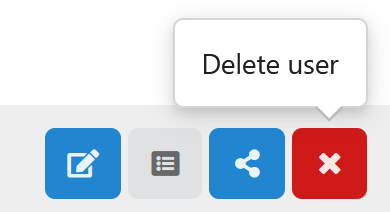
An administrator user can delete a group by clicking on the “Detele Group” button.
When a group is deleted the group members won’t have access rights any longer on the environments, 3D videos or media on which the group was given access.
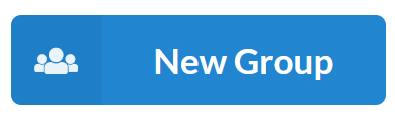
An administrator user can create a group attached to the company by clicking on the “New Group” button.
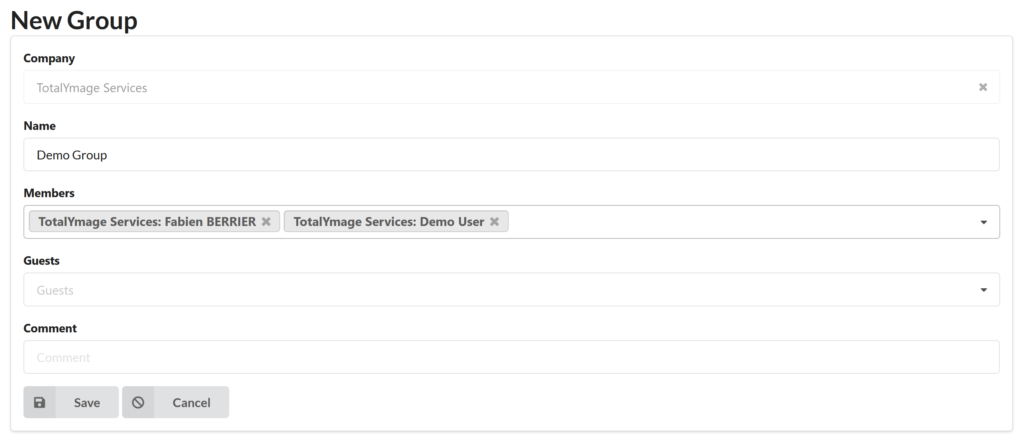
The administrator user must input the Name of the group.
The administrator user can select users of the company and include them as members of the group.
The administrator user can also select guests (users who are external to the company) to include them as members of the group.
The administrator user must click on the “Save” button to create the group in the company account.
To add a new member in a group or to delete a group member, the administrator user must modify the profile of the user in the “Users” section.
The Users section
An administrator user can create and manage the users of the company in the “Users” section.
Editor and visitor users don’t have access to the “Users” section.
We document below all the functionalities of the Users section.
Create New User
An administrator user of a company can create a new user.
The new user will immediately become part of the Company users.
In the “Users” section the administrator user creates a new user by clicking on the “New User” button.

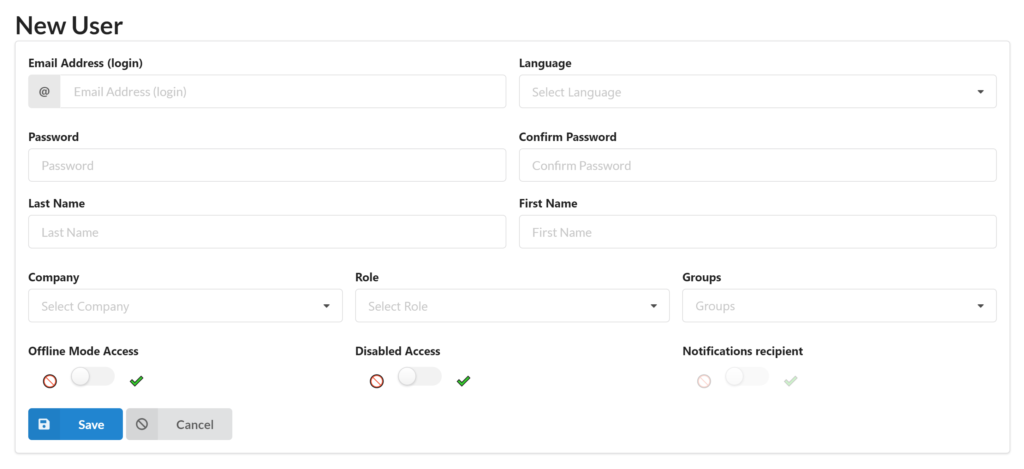
This opens the “New User” form with all users details fields.
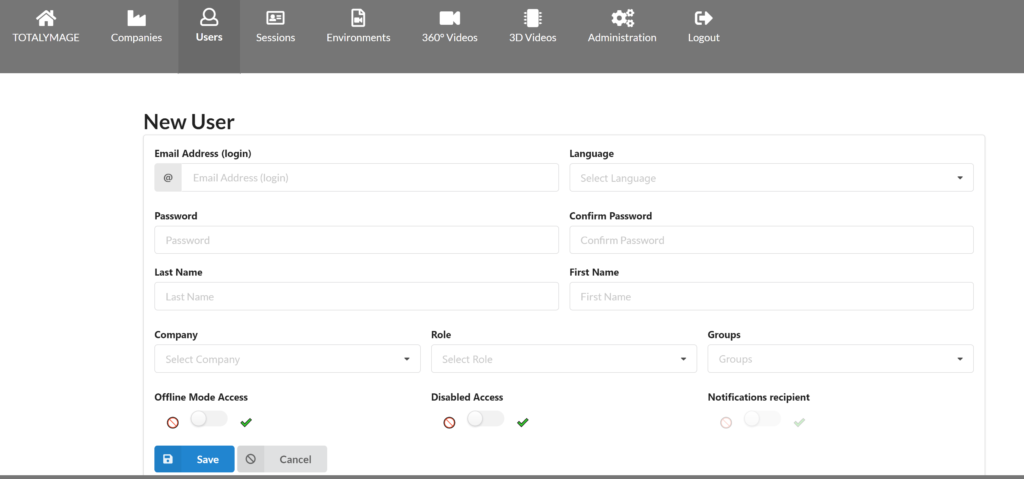
The administrator user must fill in every field of the “New User” form:
– Email Address
– Language
– Password to be entered twice: in the “Password” and “Confirm Password” fields
– Last name
– First name
– Role: administrator, partner, editor or visitor; as a rule an administrator can create a new user with an administrator, editor or visitor role; a partner can create a new user with a partner, administrator, editor or visitor role; a super administrator can create a new user with any role
The administrator user can:
– include the new user in a group of the company; the existing groups will be displayed in the dropdown list
– give an Offline access to the new user.

An Offline access gives a user an access to the TotalYmage application even if the user doesn’t have an internet or wifi connection.
The Offline access is granted for a certain period that is defined by super administrators (that’s us !) to the company.
Each time users login to the TotalYmage application with an internet access, an expiring date of the Offline connection is set to the current date + the defined length of the Offline period.
Users are able to login without internet connection, until that date.
The Offline connection of a company is generally allowed for 24h or a few days maximum, so that users can access the application without internet.
The administrator of a company should be aware that if one company user resigns or is dismissed, there would be no way to prevent the user to continue to access the company’s environments until the Offline period ends.
A user who was not granted an Offline access by the company’s administrator, will only be able to login to the application when internet is accessible.
In case the user was not granted an Offline access and doesn’t have access to internet while login to the TotalYmage application, the user will have the error message “No internet connection”.


The administrator user may disable the access of a user to the TotalYmage tools; it is sometimes useful to prevent temporarily a user’s access, without deleting the user from the back-office.

Unless the administrator user disables the access, a user has access to the TotalYmage back-office and applications.
When the administrator user has completed the “New User” form and clicks on the “Save” button, the invited user is immediately registered as a TotalYmage user.
Invite User
The administrator of a company can invite users to register to the TotalYmage back-office.
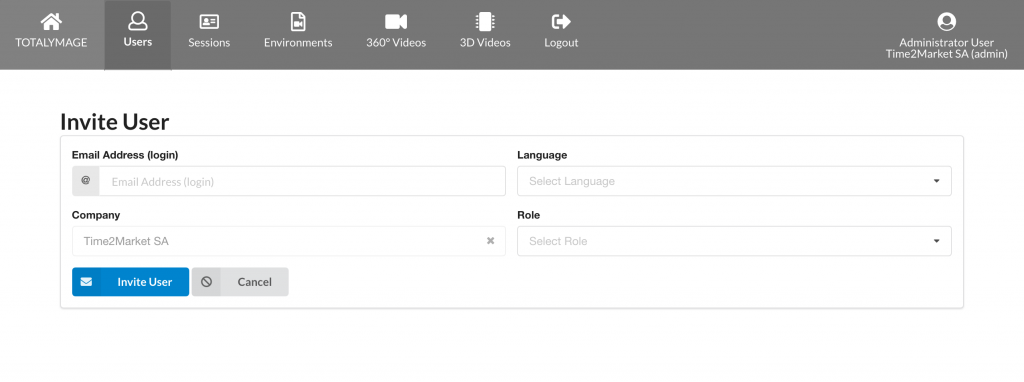
In the “Users” section the administrator user can invite a user by clicking on the “Invite User” button.

Upon clicking on the “Invite User” button, the “Invite User” form is displayed.

The administrator must input the future user’s email, the preferred language and the role of the user : visitor or editor or administrator.
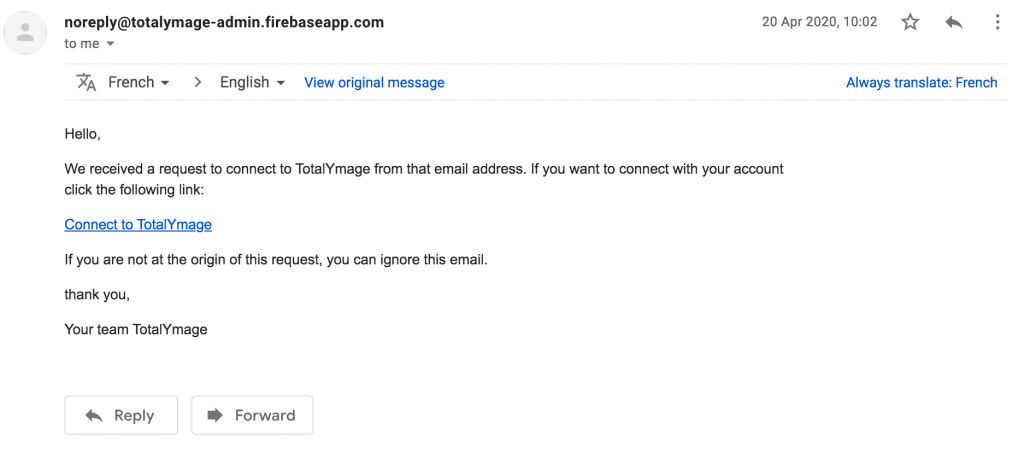
As soon as the administrator user clicks on the “Save” button, the invited user receives an invitation email.
If the email language is not the best one for the user, it is possible for the user translate the email with the embedded Google tool.
The invited user must click on the link to register.
The “User Account Activation” form is displayed.
Upon filling in first name, last name and the password in the fields “Password” and “Confirm Password” of the form, confirming acceptance of the TotalYmage general terms, and clicking on the “Activate my account” button, the user will be registered as a TotalYmage user.
The user is able to access the back-office and the TotalYmage applications and tools with the same credentials.
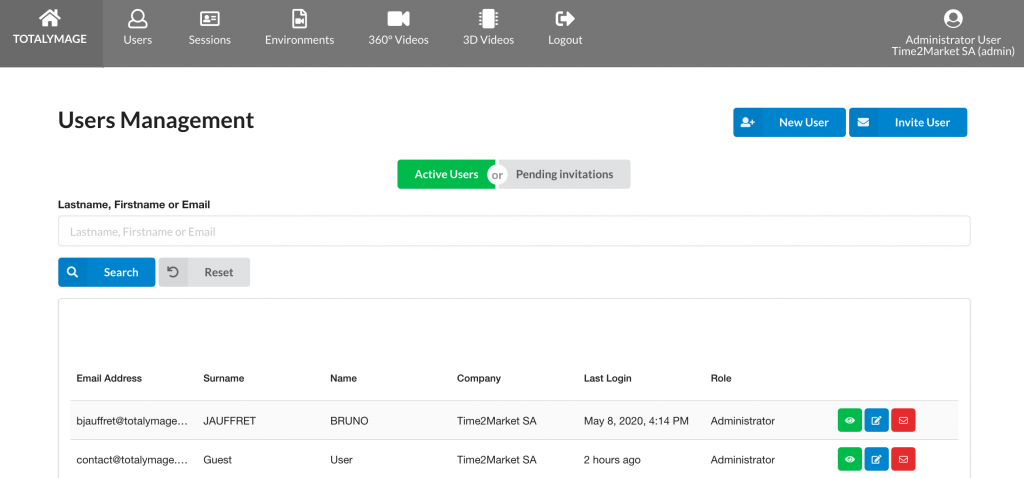
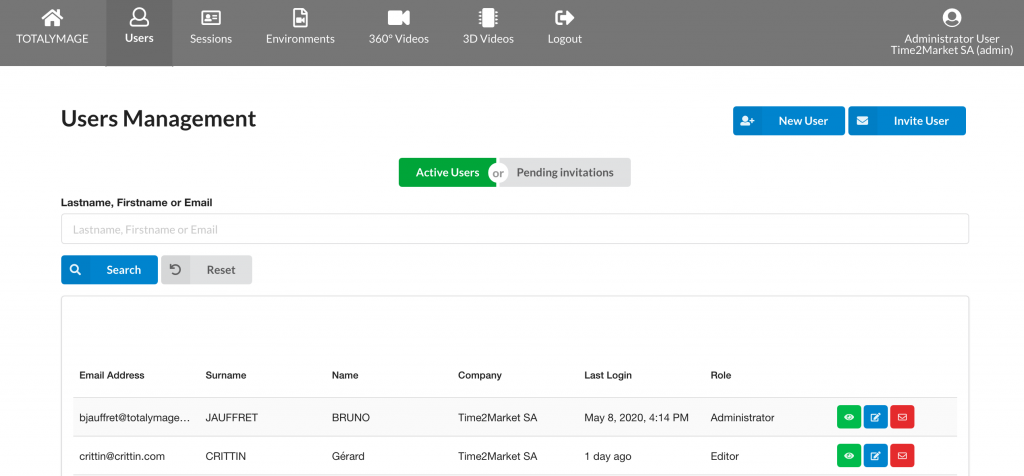
Display the Users

An administrator user can display the users of the company in three categories:
– the active users
– the pending invitations
– the deleted users
The Active users are the users who already registered.
The administrator user can display the active users by clicking on the “Active Users” button.
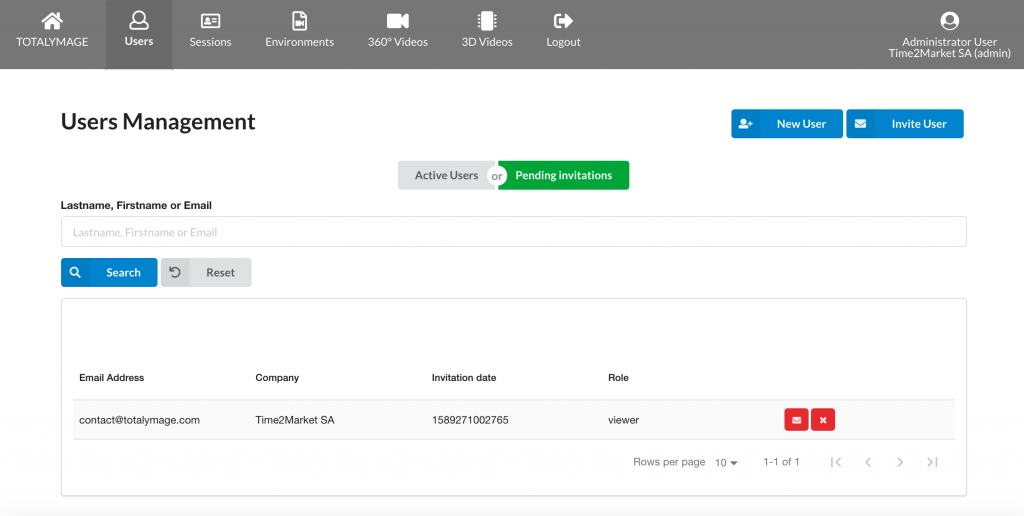
The Pending invitations are for the users who were invited by the administrator users of the company, but didn’t complete their registration yet.
The administrator user can show the list of the invitations sent by clicking on the “Pending invitations” button.
The Deleted users are the users who were deleted by one of the administrator users of the company.
Search users
An administrator user can search users by entering part or whole of a first name, name or email.

The administrator user may click on the “Reset” button to delete the previous searched name.
Display a user activity

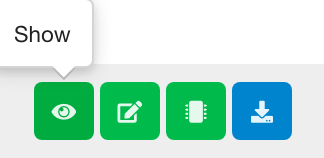
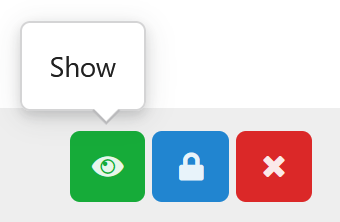
An administrator user can zoom on a user activity by clicking on the “Show” button.

Upon a click on the “Show” button an administrator user can view the details and the activity of the user”
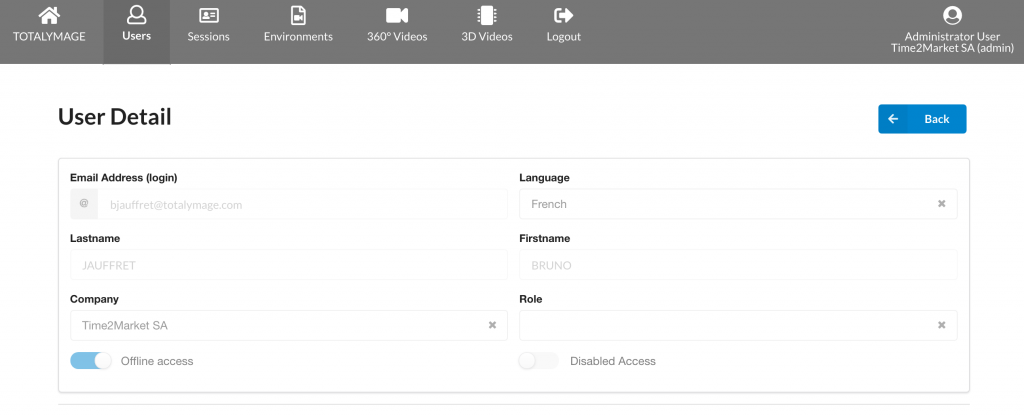
Change the data of a user
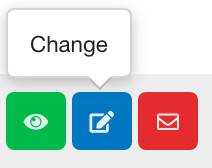
An administrator user can change the data of a user by clicking on the “Change” button.

The administrator user can modify any of the fields of the user’s data.
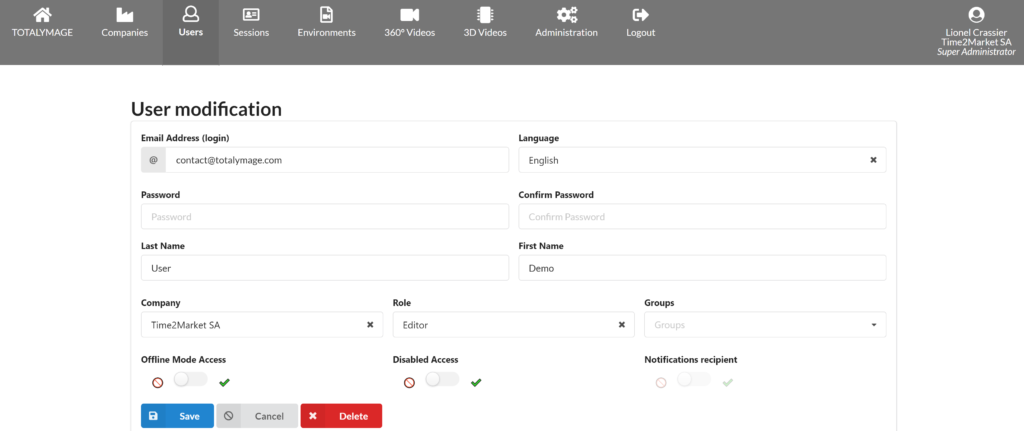
Once the changes are completed the administrator user must click on the “Save” button to save the user’s data in the back-office.
Reset password
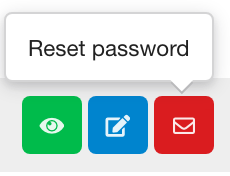
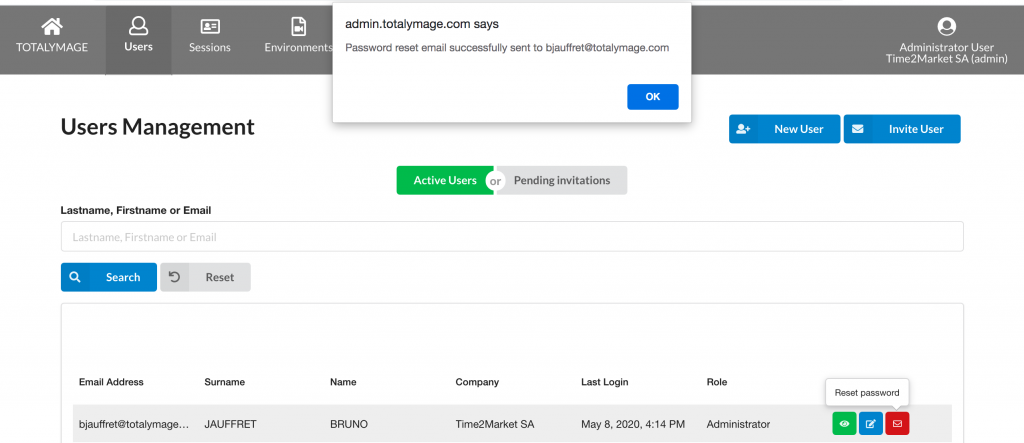
An administrator user can at any time reset the password of a user.

When an administrator user clicks on the “Reset password” button, a confirmation of the sending of an email is displayed at the top of the page
Upon receiving and opening the email the user must click on the link in the email.
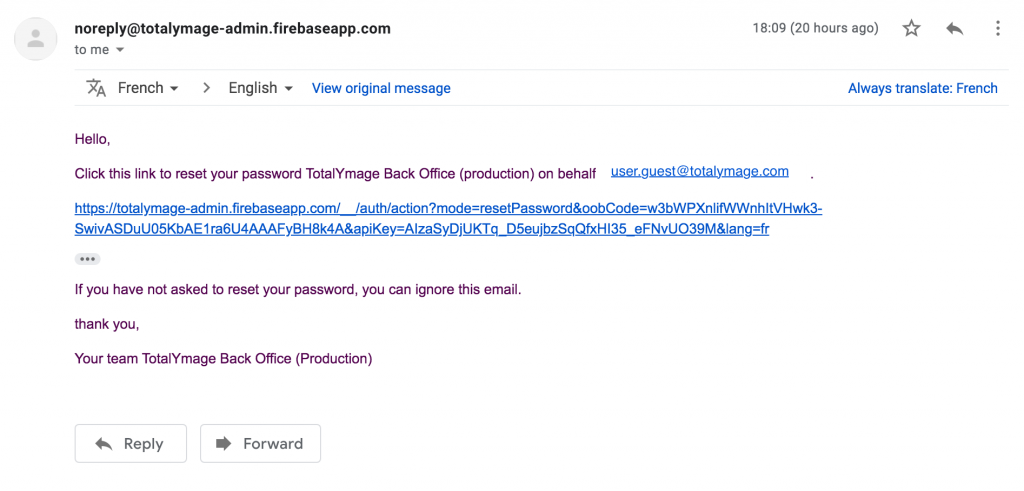
Upon clicking on the link in the email the user must enter the new password and save it.

An alternative way for a user to reset a password
From the login page of the back-office a user can click on the “Forgot Password” link.
Upon clicking on the “Forgot password” link, the user receives an email to reset the password.
Upon clicking on the link in the email the user must enter the email address of the account for which the password needs to be reset and the user must click on the “Reset My Password” button.
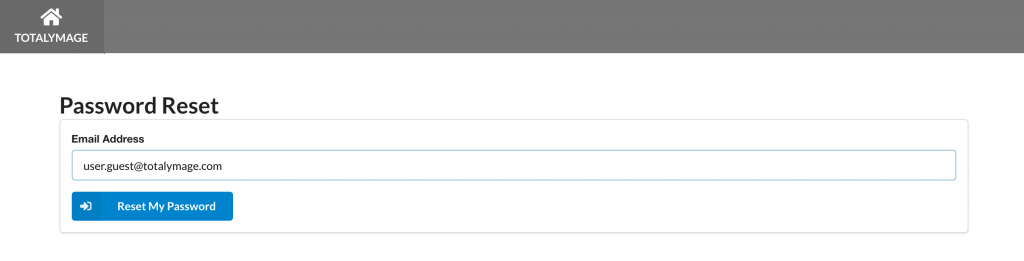
Upon clicking on the “Reset My Password” button, the user must enter the new password and save it.
The Sessions section

An administrator user can display the sessions of the users of the company in the “Sessions” section.
Editor and visitor users don’t have access to the “Sessions” section.
We document below all the functionalities of the “Sessions” section.
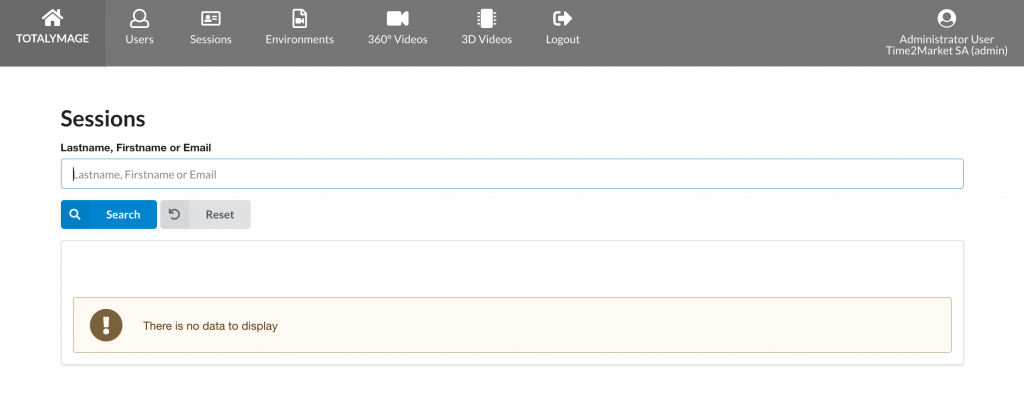
Search users sessions
An administrator user can search users sessions by entering part or whole of a first name, last name or email of a user.

Once a name is entered in the search bar, and upon a click on the “search” button, the results are displayed below.

Display a user session
An administrator user can access all sessions of the users of the company.
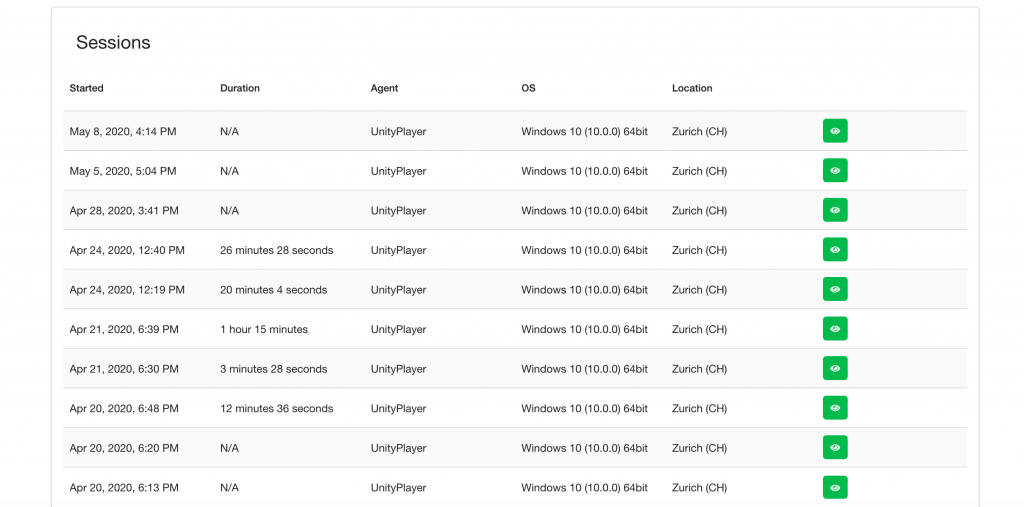
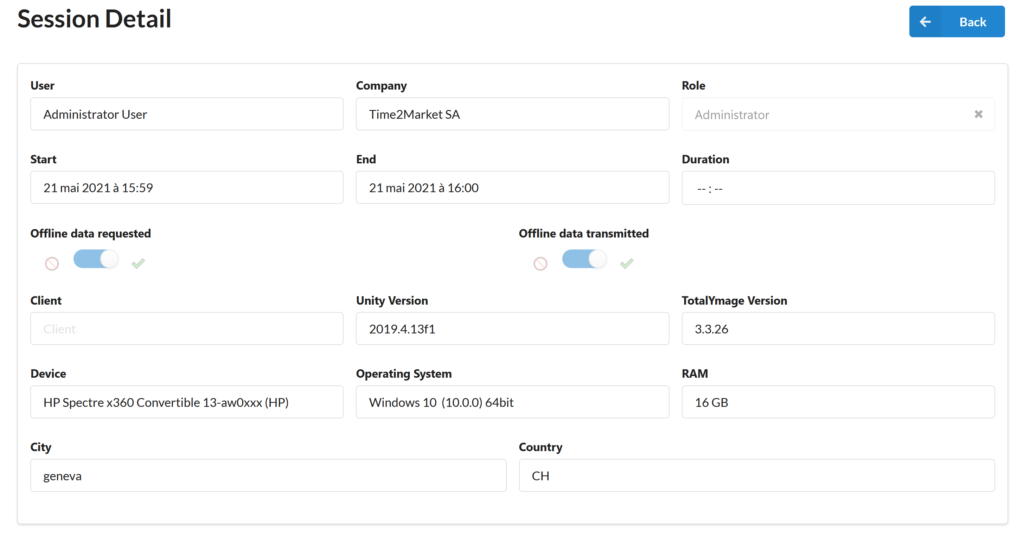
An administrator user can access the details of a user session by clicking on the “Show” button.
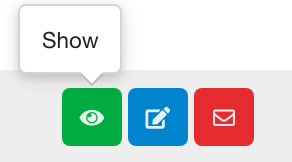
Upon clicking on the “Show” button an administrator user can view the details of the user session.
The Environments section
An administrator user can display the environments of the company in the “Environments” section.
Editor and visitor users don’t have access to the “Environments” section.
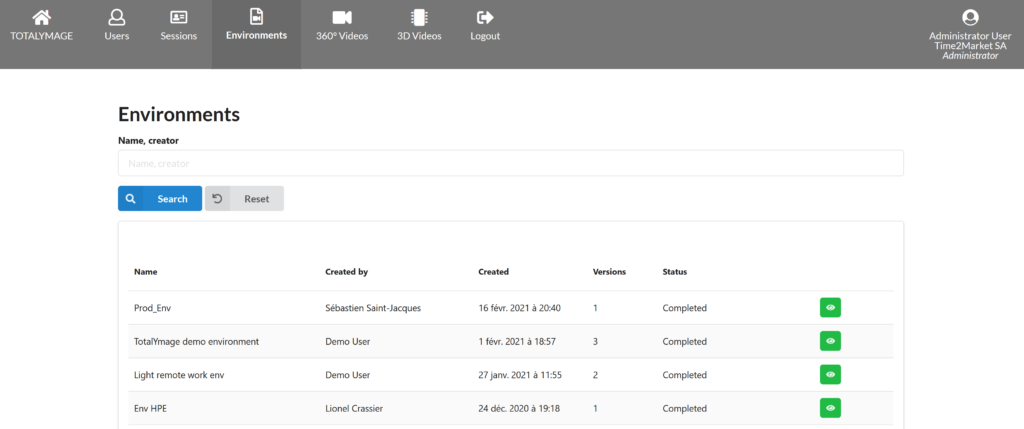
An environment is a set of interactive projects, dashboards and presentations created in the TotalYmage application.
An editor user must use the TotalYmage application to create an environment.
The first upload of an environment creates a folder for the future versions of the environment and creates the first version of the environment.
The picture above shows 4 environments in the backoffice of the company.
Every user can upload only one version of a given environment.
The environment “Prod_Env” contains only one version, therefore from only one user.
The environment “TotalYmage demo environment” contains 3 versions, hence from 3 different users.
Every environment version is managed by its creator (an editor user) or by an administrator user of the company, who can give access rights to users of the same company or to a group belonging to the company (which can include guests from other companies).
A user who was given access rights on an environment version can click on the environment name in the “online environments” list in the TotalYmage application, and can access the environment version to download it locally.
We document below the functionalities of the Environments section.
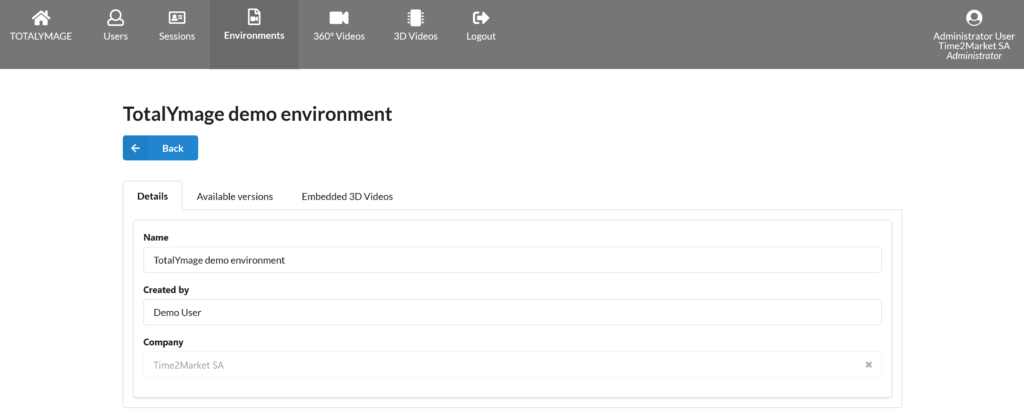
Display the details of an environment
An administrator user can access the details of an environment by clicking on the “Show” button.
Upon a click on the “Show” button an administrator user can view the details of an environment: its name, creator and company.
An administrator user can click on the “Available versions” tab to see the individual environment versions uploaded by users:

Each user can upload his/her version of an environment.
When a user uploads successive versions of the same environment, the previous version is replaced by the new one.
On the picture above one can see that the 2 users who uploaded their version of this environment, uploaded two versions. Only the last one remains stored in the backoffice and remains available granted the access rights.
An administrator user can click of the “Embedded 3D Videos” tab to see the list of 3D Videos that are linked to each environment version.
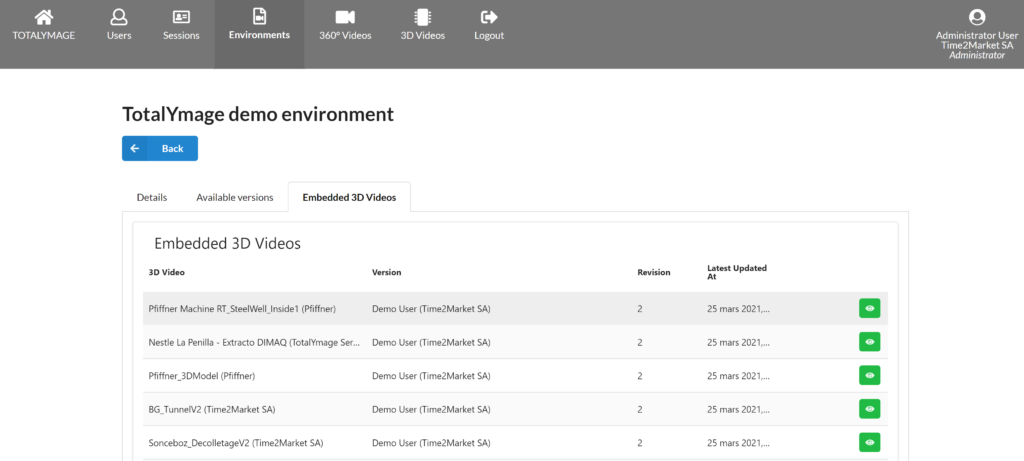
The 3D videos were linked to a scene while creating the environment in the TotalYmage application.
If a user was given access rights on an environment version and starts downloading it, the 3D videos linked to the environment version will be downloaded automatically.
In the picture above one can see 5 3D videos linked to the version of Demo user of the environment “TotalYmage demo environment”.
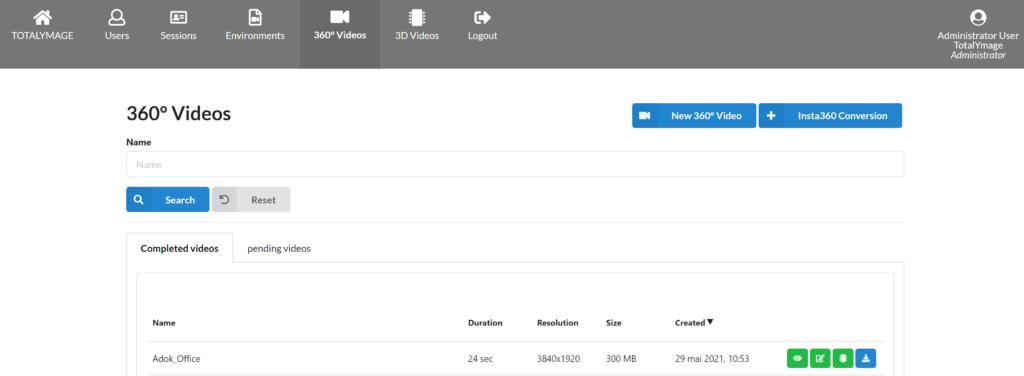
The 360° Videos section
An administrator user can upload and manage the 360° Videos of the company in the “360° Videos” section.
Editor and visitor users don’t have access to the “360° Videos” section.
The TotalYmage application allows to create interactive content that can be 3D-positioned in 360° videos.
The 360° videos need to be captured in movement on a smooth trajectory.
We document below all the functionalities of the 360° Videos section.
New 360° Video
There are two ways to upload captured 360° videos in the back-office.
An administrator user can upload a new 360° video in the company’s back-office account from an external file in .mp4 format.

The administrator user can click on the “New 360° video” button which displays the “New 360° Video” form.
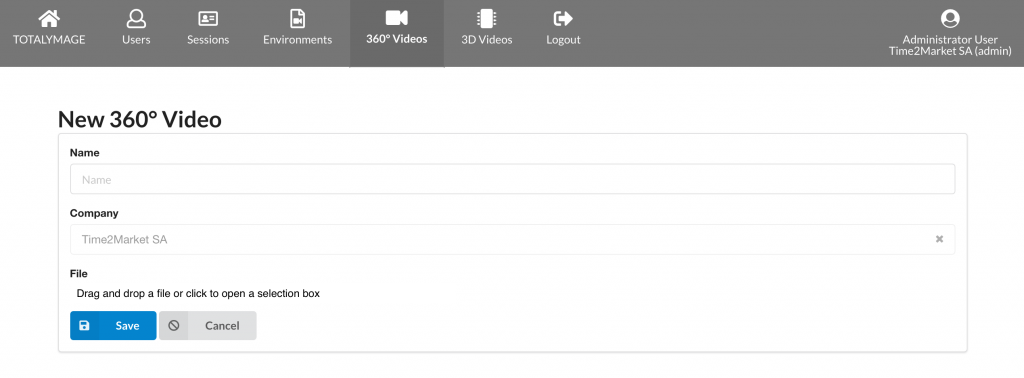
The administrator user must:
– Enter a name for the 360° video
– Drag & drop a file, or click on the “Drag & drop a file or click to open a selection box” button, to upload the external 360° video file in .mp4 format; it may take a few minutes to upload entirely the 360° video
– Save the inputs
Once a 360° video is created in the back-office an administrator user can display, modify, delete and vectorize the 360° video.
Insta360 Conversion
There are two ways to upload captured 360° videos in the back-office.
An administrator user can upload a new 360° video in the company’s back-office account from the two external files in .insv format of a capture.
The administrator can click on the “Insta360 Conversion” button which displays the “Insta360 Conversion” form.
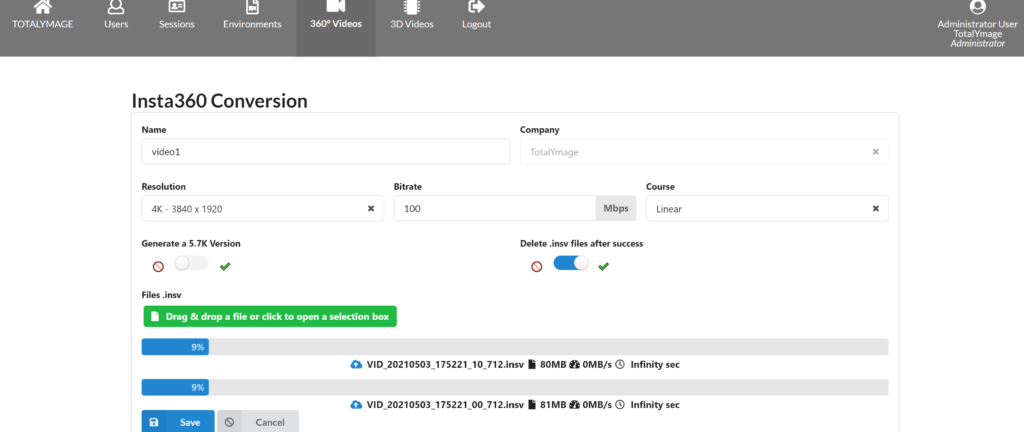
The administrator user can:
– modify the resolution – for now fixed at 4K
– modify the bitrate
– modify the type of course (linear/Non linear) – for now fixed at Linear
– tick the toggle “Generate a 5.7K Version”
– tick the toggle “Delete .insv files after success”
The administrator user must:
– Enter a name for the resulting 360° video
– Drag & drop the two .insv files, or click on the “Drag & drop a file or click to open a selection box” button and select the two .insv files; it may take a few minutes to upload entirely each of the .insv files

At the end of the upload of the two .insv files, the administrator user must click on the “Save” button.
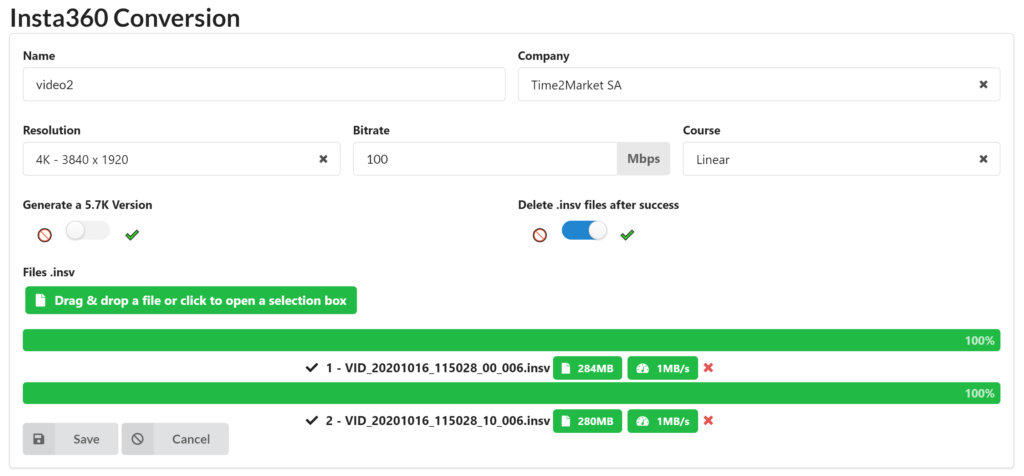
Upon saving the “Insta360 Conversion” form, the Insta360° conversion process of the 2 .insv files into a single .mp4 360° video will start on the dedicated server.
The video appears in the “pending videos” tab until the process is finished.
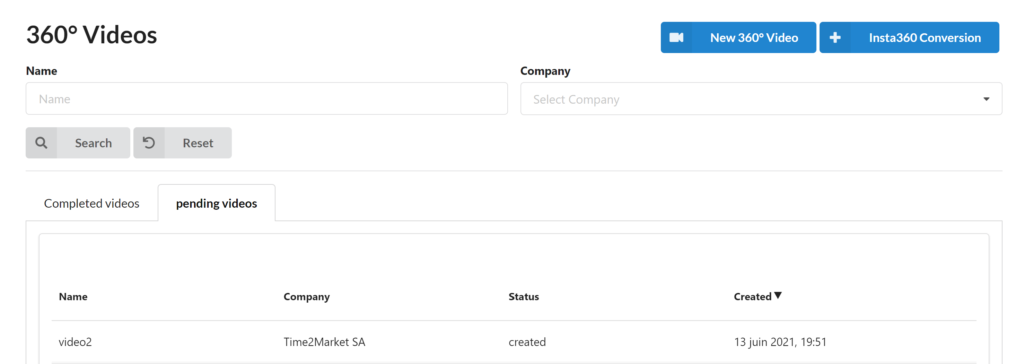
Upon the completion of the 360° conversion process, the 360° video will be displayed in the “Completed videos” tab, along with the 360° videos that were uploaded in .mp4 format.

Search 360° videos
An administrator user can search 360° videos by entering part or whole of a 360° video name.

Display a 360° video
An administrator user can access the details of a 360° video by clicking on the “Show” button.
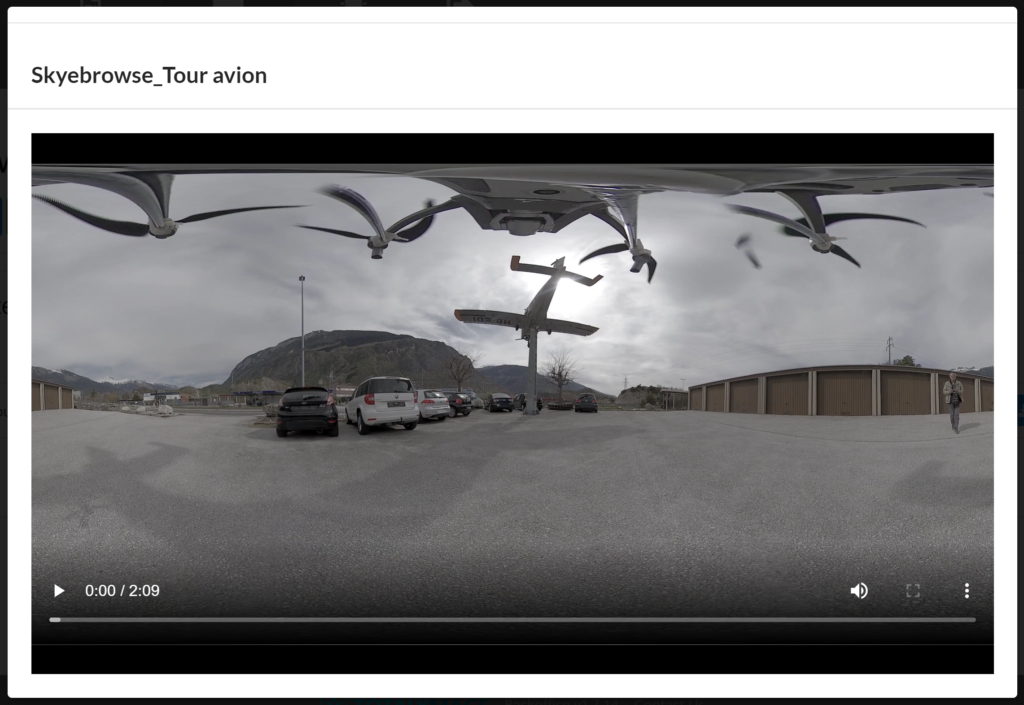
Upon a click on the “Show” button the 360 video page is displayed.
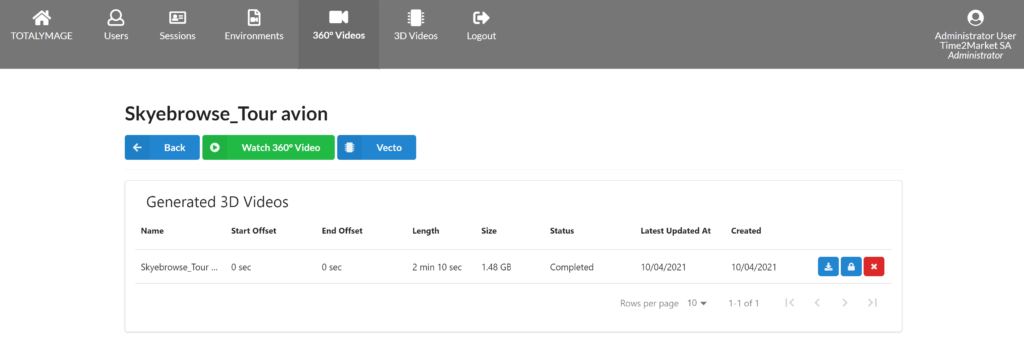
An administrator user can watch the 360° video by clicking on the “Watch 360° Video”.

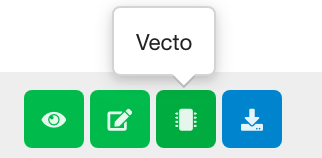
An administrator user can launch the vectorization process by clicking on the “Vecto” button.

The vectorization allows to create a 3D video from the 360° video of the captured location.

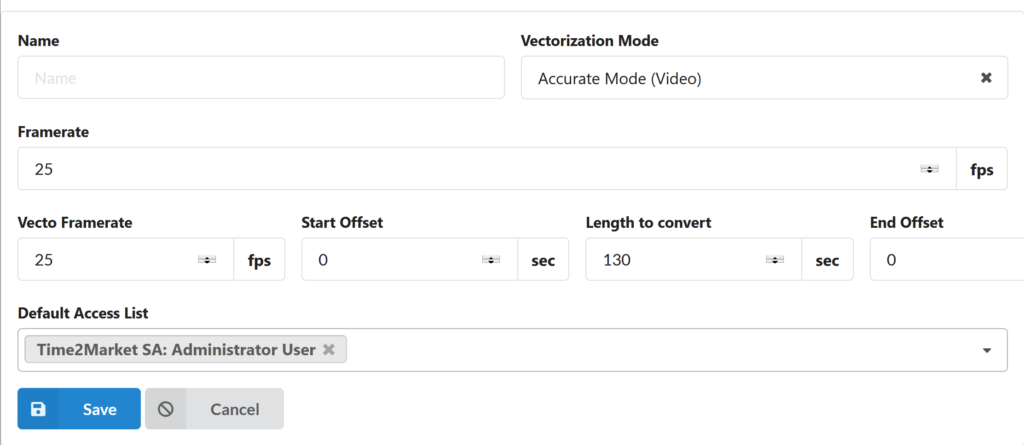
To start the vectorization process the administrator user must:
– Select a blue point on the video timeline to define the first image of the 3D video to generate
– Select a blue point on the video timeline to define the last image of the 3D video to generate
– Enter a name for your 3D video
– Save the parameters of the vectorization to launch the process
The vecto framerate is by default the framerate of the 360° video, but the administrator user can modify it with a smaller number; it sets the distance between the images.
The “Start Offset”, “Length to convert”, “End Offset” parameters are automatically calculated from the selection of the first and last images of the 3D video to generate.
At the end of the vectorization process, the 3D video files are created, including a .mp4 video of the location and the 3D positioned points of interest.
The 3D videos are stored in the back-office and can be managed in the “3D Videos” section.
A 3D video can be linked to the scene of an environment by an editor user in the TotalYmage application.
Modify a 360° video
An administrator user can modify a 360° video by clicking on the “Modify” button.
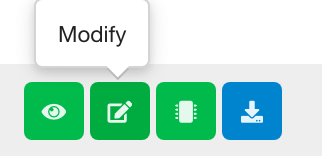
Upon a click on the “Modify” button the “Modify 360° Video” page is displayed.
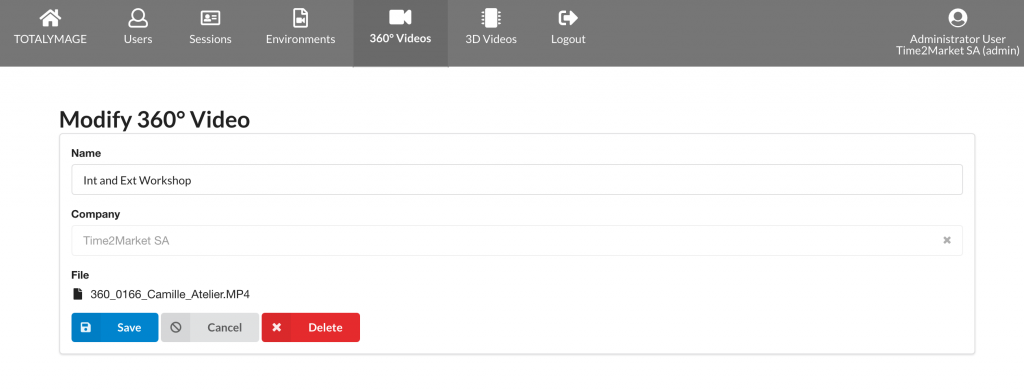
The administrator user can rename the 360° video.
The administrator can see the current video file of the 360° video.
The administrator user can change the video file by clicking on the “Drag & drop a file or click to open a selection box” button.
Once changes are done, the administrator user must click on the “Save” button to record the new details for the 360° video.
This may take a few minutes if the administrator user changed the video file.
Vectorize a 360° video
An administrator user can vectorize a 360° video by clicking on the “Vecto” button.
The vectorization allows to create a 3D video from the 360° video of the captured location.
Upon a click on the “Vecto” button the Vectorization page is displayed.
To start the vectorization process the administrator user must:
– Select a blue point on the video timeline to define the first image of the 3D video to generate
– Select a blue point on the video timeline to define the last image of the 3D video to generate
– Enter a name for your 3D video
– Save the parameters of the vectorization to launch the process
The vecto framerate is by default the framerate of the 360° video, but the administrator user can modify it with a smaller number; it sets the distance between the images.
The “Start Offset”, “Length to convert”, “End Offset” parameters are automatically calculated from the selection of the first and last images of the 3D video to generate.
At the end of the vectorization process, the 3D video files are created, including a .mp4 video of the location and the 3D positioned points of interest.
The 3D videos are stored in the back-office and can be managed in the “3D Videos” section.
A 3D video can be linked to the scene of an environment by an editor user in the TotalYmage application.
Download a 360 video
An administrator user can download a 360° video from the back-office by clicking on the “Download” button.
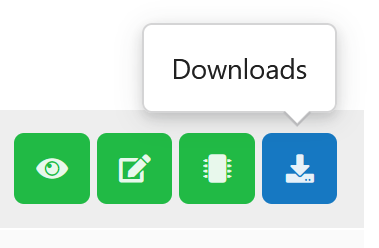
As an exemple a 360° video can be downloaded and used as a media content of an overlay.
The 3D Videos section
A 3D video is generated from a 360° video in the back-office through the vectorization process.
A 3D video includes a .mp4 video, the coordinates of the hard points that are displayed when creating a scene overlay linked to the 3D video, and some specific data.
An administrator user can manage the 3D Videos of the company in the “3D Videos” section.
Editor and visitor users don’t have access to the “3D Videos” section.
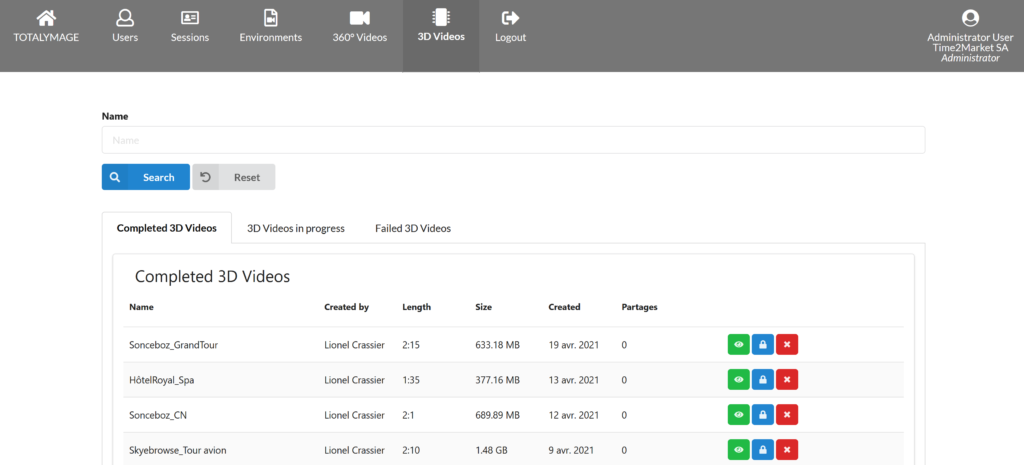
The 3D videos are listed in three different tabs, depending on whether their vectorization is complete, in progress or if it failed.
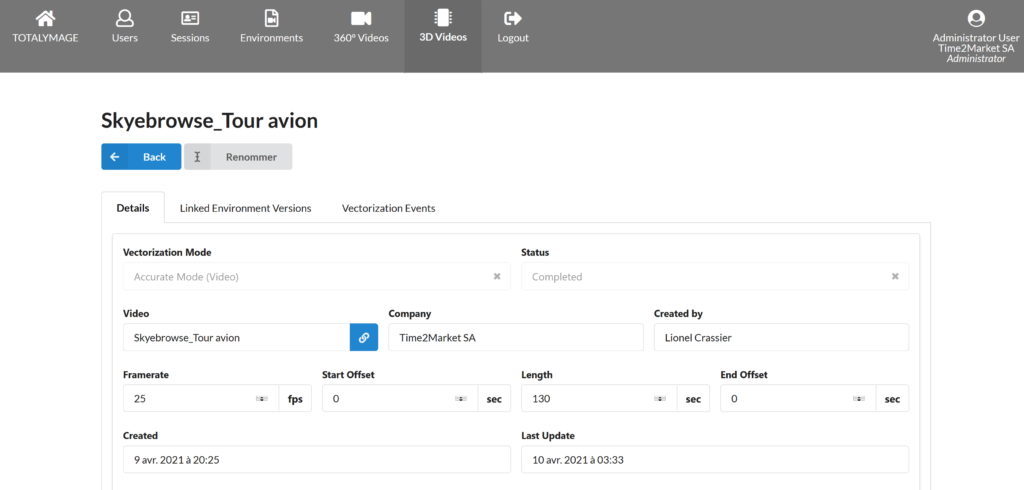
For each of the completed, in progress and failed 3D videos, the administrator user can access the 3D video details by clicking on the “Show” button.
Upon clicking on the “Show” button, the details of the 3D videos are displayed in the “Details” tab.
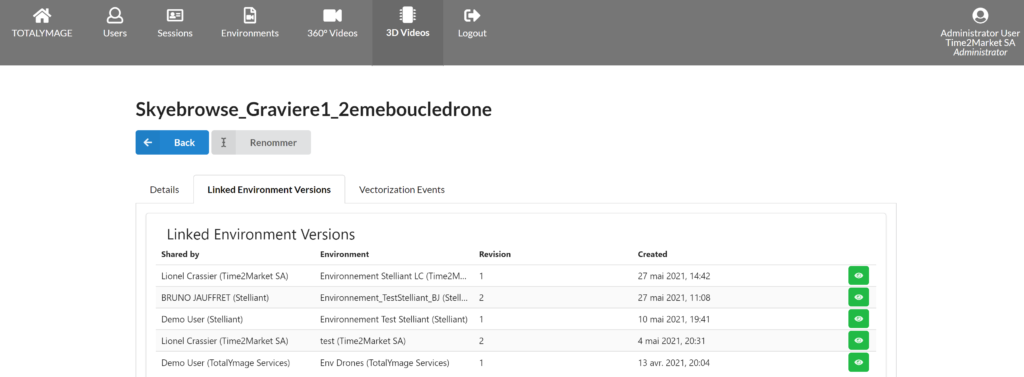
In the “Linked Environment Versions” tab, an administrator user can see the list of the environment versions that have at least one scene linked to this 3D video.
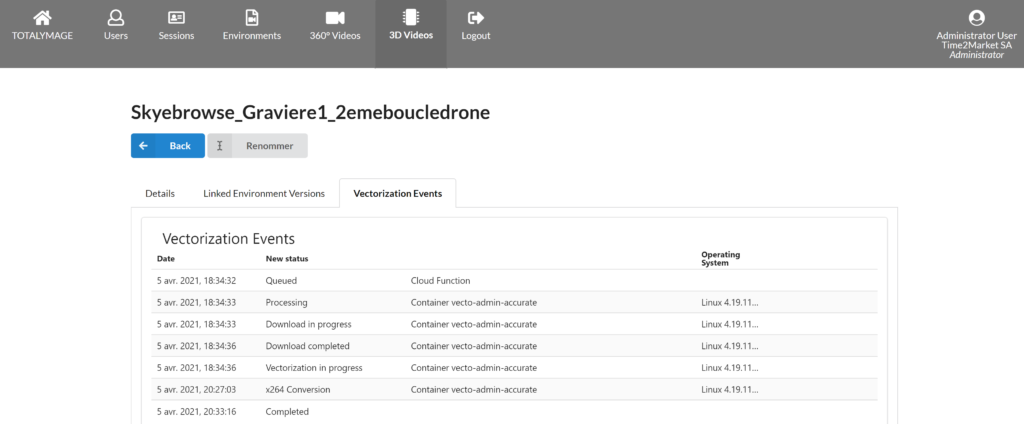
In the “Vectorization Events” tab, an administrator user can see the parameters used during the vectorization process to generate the 3D video.
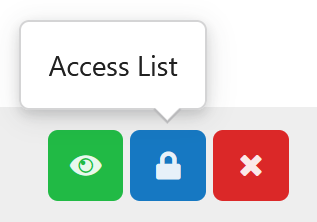
Upon clicking on the “Access List” button, the list of the users who have access rights on the 3D video is displayed.
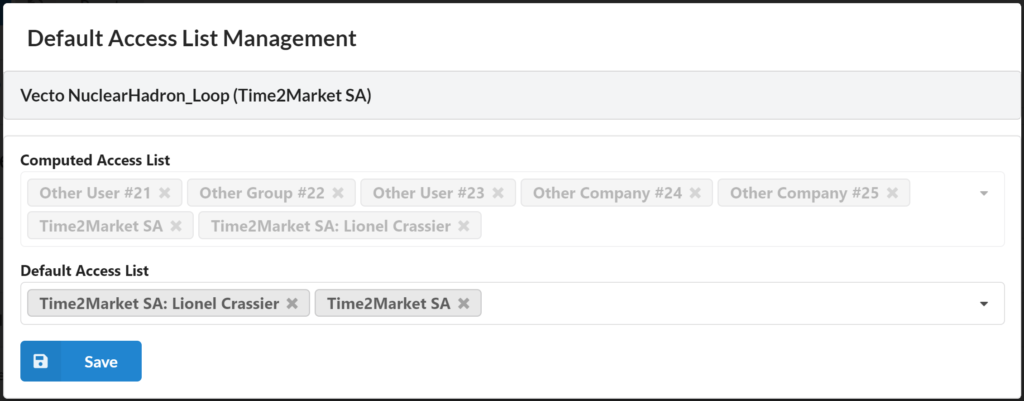
The Default Access List shows the companies, groups and individual users who have been given the access rights on this 3D video.
An administrator user can add or delete members in the Default Access List.
The Computed Access List shows the companies, groups and individual users who have access rights on this 3D video, either directly because they were added in the Default Access List, or because they have been added in the access list of at least an environment version linked to this 3D video.
The companies, groups and individual users that are external to the company of the current user are listed but their names are not displayed (for example Other Company #24, Other User #21).
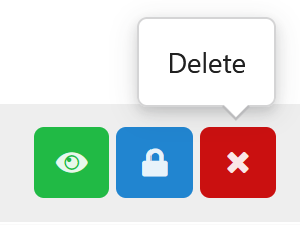
Upon clicking on the “Delete” button, an administrator user can delete a 3D video.
Beware, for the moment there is no restore button for 3D videos.
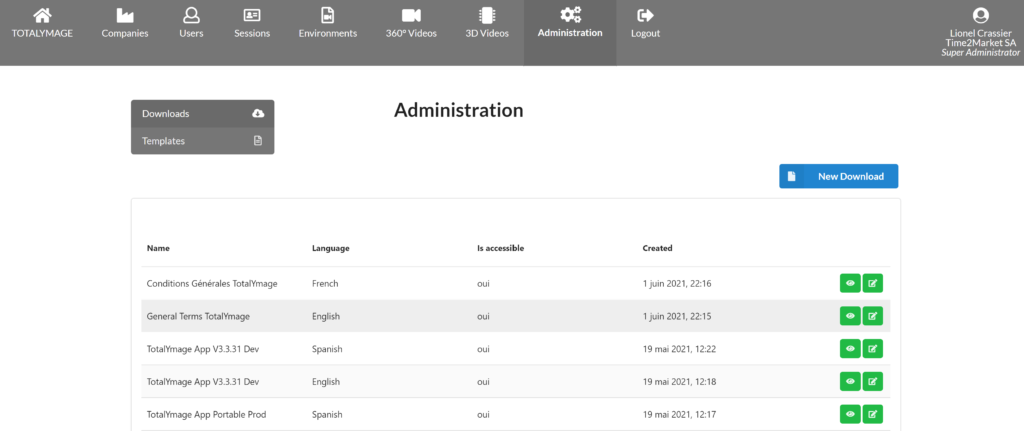
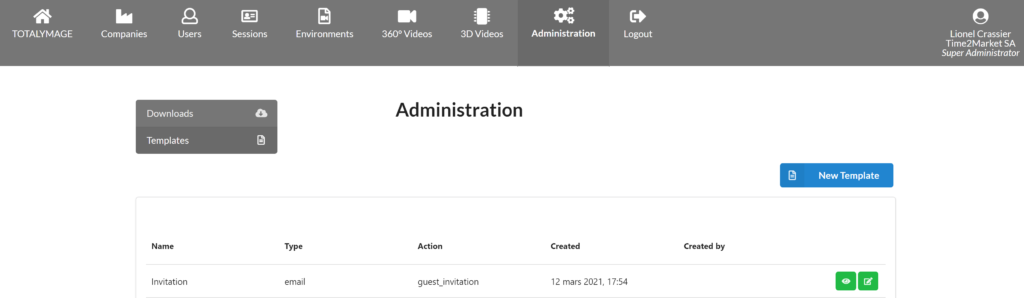
The Administration section
A super administrator user (that’s us!) can access the “Administration” section.
Partner, administrator, editor and visitor users don’t have access to the “Administration” section.
A super administrator can create, manage, delete and publish the files that are displayed in the TOTALYMAGE section, and can create email templates. In each language.
The files are the different available versions of the TotalYmage application, the General Terms and any file to be displayed to all TotalYmage registered users.
A super administrator can create, manage and delete email templates. In each language.
The Logout section
All users can access the “Logout” section.
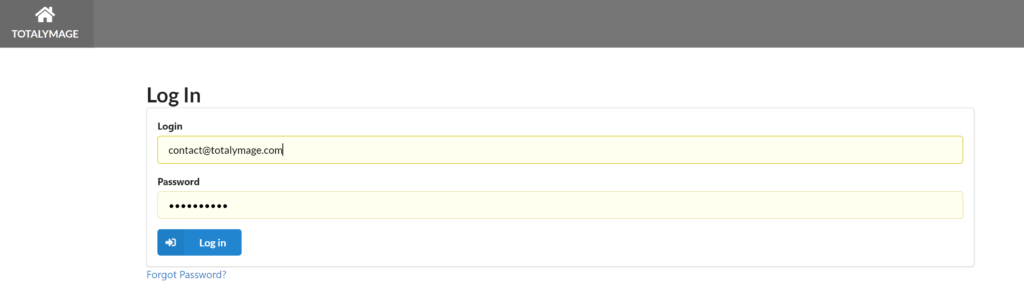
A user must enter login and password to login to the backoffice.